Tuesday, April 21, 2015

Importance of Fact Fluency

How many times have you tried to start a lesson, teaching area, perimeter, or adding and subtracting fractions, and your students are able to understand the higher level concept, but are struggling with doing the basic math?  Are they counting on their fingers or making tally marks?  This is something I've run into many times, and my solution-- practicing math facts every day!

I teach 3rd  grade, so I focus on building their fact fluency in multiplication and division, but I spend the beginning of my year working on their addition and subtraction fact fluency.

To do this, I've created my Mad Minutes!


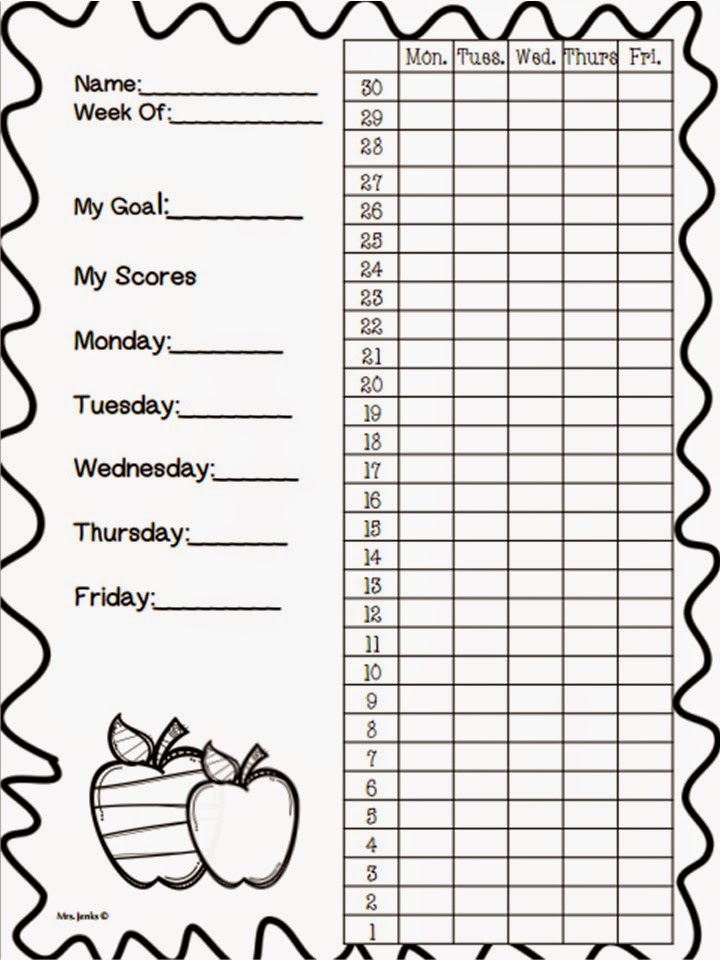
 I've built in a routine into every math class.  The first thing we do is take out our Mad Minute folder (which happens to be purple this year), write our name on the top of the mad minute, and raise our pencil so I know when everyone is ready.  Using a timer on my projector, I set the clock to 1 minute and then we GO! For the most parts, students LOVE this and frantically try to get as many answers down as possible.  When the minute is over, we switch with a neighbor to correct then fill out their weekly graph tracking their progress.

On Fridays, I collect their folders to see if they reached their weekly goal I set (I usually go 5 problems above what they scored the week before), give them a new graph with a new goal, and if they met their goal, they get a sticker on the front of their folder.


By the end of the year,their folders are usually covered.  Their goals are personal, but I try to make them realistic for each individual student so they are experiencing success.

From selling them on teacherspayteachers, I know some teachers use them for fluency stations as well.  Check out this free preview from my store!
  

If you love them, check out all my different Mad Minute Packs in my TPT store!

 Do you use mad minutes?  What do you do to build student fluency?  I'd love to hear your thoughts and ideas!

Enjoy!
Jaimie :)

Monday, March 23, 2015

Teaching Students to Measure and Create Line Plots

I love to create 'hands on' activities for my students, and when we are in the middle of graphing and measurement, 3.md.4 really lends to it!  

We have spent days in my room being able to read and interpret line plots, as well as learning how to measure to the nearest quarter inch and ordering fractions including mixed numbers.  This activity requires a lot of background knowledge, but it's great and a lot of fun!  

To start, I cut up pieces of ribbon into varying lengths between 2 inches and 5 inches.  I highly suggest using a wider ribbon (at least 1/2 inch) for easy handling and one that will not fray easily.  I then used tiny snack size baggies and gave each student 12-15 ribbons (the amount of ribbons and diversity of measurement helped to differentiate the assignment!).  

After using a focus lesson/launch of ordering fractions and mixed numbers, students set off to work with their learning partners. 


If you are trying to teach your students 3.md.4, or just want to teach an interactive math lesson, my students LOVED this.  It took about 30 minutes, varying from different sets of partners, so make sure you have 'Early Finishers' task cards ready to go!  I uploaded the activity sheet at my TPT store for free so make sure you download a copy!  

https://www.teacherspayteachers.com/Product/Measuring-and-Creating-Line-Plots-with-Ribbon-1778011

Enjoy!

Friday, June 13, 2014

Attempting a Pinterest Project... Reading Levels Folder

I am a complete Pinterest addict.  I could easily spend 5 hours on it, and not even realize it!  I am definitely a 'pinner,' and not a 'follow-througher' though.  My project last summer was to follow through with a project so I picked created a folder with students' reading levels.  If you're interested, this was the original pin.  Feel free to check it out!

So, I did it.  The first step was getting all of the DRA levels printed and cut out.  
I printed them on different, alternating colors just to make it more eye-appealing.  Afterwards, I place them inside a plain folder and laminated it.  I then used adhesive velcro (from Lakeshore Learning!)  An IMPORTANT suggestion is to play around with the layout before you glue the letters down.  It took me a few tries to find a layout that worked.  I have many English Language Learners and special education students, so many of my students end up in the I-O range for most of 3rd grade so I tried to give myself the most space here.  
  Afterwards, I wrote students names on pieces of index cards, put the other side of the Velcro on them so they were easy to move as their levels changed, and voila! 

It was a great visual tool for making guided reading groups at the beginning of the year.  I have to say that around March, aka MCAS testing season, it was brushed to the side and I didn't use it for the rest of the year.  I think it is a valuable, visual quick reference though that is worth the time to make.  In actuality, it did not take that long to make and can be used year after year! 


Who knows what my Pinterest project will be this summer...  I haven't decided quite yet, but I'll get there.  Feel free to follow me there! http://www.pinterest.com/jmaguire77/
 

Blog Template by BloggerCandy.com